10 Essential Clothing Alterations Every Fashionista Should…
10 Essential Clothing Alterations Every Fashionista Should Know! |
||
|---|---|---|
Introduction:10 Essential Clothing Alterations Every Fashionista Should Know! Fashion is an ever-evolving art form that allows us to express our creativity, personality, and unique sense of style. It's not just about following trends; it's about making a statement and feeling confident in what we wear. While finding the perfect clothing pieces off the rack can be a challenge, mastering the art of clothing alterations opens up a world of possibilities for every fashionista. With a few essential alteration skills under your belt, you can transform ill-fitting or outdated garments into personalized, perfectly tailored pieces that showcase your individuality. Clothing alterations have been a fundamental part of the fashion industry for centuries. From simple adjustments to complex modifications, altering clothing allows us to overcome the limitations of standard sizing and create a wardrobe that truly reflects our unique body shapes and personal preferences. Whether you're a seasoned fashion enthusiast or someone who simply wants to make their clothes fit better, learning these essential clothing alterations is a game-changer. In this comprehensive blog post, we will explore ten essential clothing alterations that every fashionista should know. These alterations encompass a wide range of techniques and skills that will empower you to elevate your style and make your wardrobe truly your own. By the end of this guide, you'll have a solid understanding of each alteration, as well as tips on how to execute them with precision and finesse. From simple adjustments like hemming pants and skirts to more complex alterations such as resizing tops and dresses, each technique serves a specific purpose in achieving a flawless fit. We'll cover altering waistbands to ensure the perfect fit, reshaping or taking in shoulders for improved garment structure, and shortening or lengthening sleeves to enhance the overall proportions of your outfits. Furthermore, we'll delve into the art of tapering pants and skirts to create a sleek and streamlined silhouette. We'll explore the addition of darts to achieve a more tailored look, and we'll discuss how resizing tops and dresses can salvage and transform ill-fitting pieces into wardrobe favorites. Additionally, we'll touch upon the importance of buttons and zippers, not only as functional elements but also as design details that can be added or replaced to enhance the overall aesthetic of a garment. We'll also cover adjusting necklines to suit your style and repairing rips and tears to extend the life of your beloved clothing items. Throughout this guide, we'll provide step-by-step instructions, valuable tips, and helpful insights to help you navigate these alterations with confidence. Whether you choose to embark on these alterations as DIY projects or seek the assistance of a skilled tailor, the knowledge you gain from this blog will empower you to make informed decisions about your clothing and create a wardrobe that is uniquely yours. Remember, fashion is about embracing your individuality and celebrating your personal style. By mastering these essential clothing alterations, you'll have the power to transform your wardrobe and make a statement wherever you go. So, let's dive into the world of clothing alterations and unlock the full potential of your fashion journey! |
||
 |
||
Hemming Pants and Skirts:One of the most common and essential clothing alterations every fashionista should know is hemming pants and skirts. The length of your bottoms can make or break an outfit, so achieving the perfect hem is crucial for a polished and tailored look. To begin hemming pants or skirts, you will need a few essential tools: a sewing machine or needle and thread, pins, fabric scissors, a measuring tape, and an iron. Follow these steps to hem your pants or skirts to the desired length: Try on the pants or skirt with the shoes you plan to wear them with. This will help you determine the ideal length. Mark the desired length using pins or fabric chalk. Ensure the hem is even all around by measuring from the ground or using a ruler. Take off the garment and turn it inside out. If there is an existing hem, use a seam ripper to remove it carefully. Fold the fabric up to the desired length, following the marked line. Use pins to secure the fold in place. Make sure the fold is even all the way around. Try on the garment again to double-check the length. Make any necessary adjustments before proceeding. Using a sewing machine or needle and thread, stitch along the folded edge, approximately 1/4 to 1/2 inch away from the edge. Use a straight stitch or a blind hem stitch for a neat finish. Once the hem is stitched all the way around, try on the garment again to ensure it falls at the desired length. Trim any excess fabric, leaving a small seam allowance. This step is optional but can help reduce bulk in the hem. Press the hem with an iron to give it a crisp finish. Make sure to follow the fabric's care instructions to avoid damaging it with excessive heat. Congratulations! You have successfully hemmed your pants or skirt to the perfect length. Remember to repeat the process for each leg or side of the garment if necessary. Hemming is a versatile alteration that can be applied to various styles, from trousers and jeans to skirts and dresses. By mastering the skill of hemming, you can transform garments that are too long or uneven into stylish pieces that complement your body shape and proportions. Additionally, hemming allows you to customize your clothing to suit different occasions or trends, ensuring that your outfits always look sharp and well-tailored. If you are new to sewing or find the process overwhelming, consider seeking the assistance of a professional tailor. They have the expertise and specialized equipment to ensure precise hemming and can provide valuable advice on fabric selection, thread color, and other factors that contribute to a flawless alteration. Remember, the goal of hemming is to create a clean and polished finish, so take your time and pay attention to detail. With practice, you'll become more confident in hemming various types of pants and skirts, allowing you to maintain a versatile and well-fitted wardrobe. Hemming is a foundational alteration technique that opens up a world of possibilities for your fashion choices. Don't shy away from experimenting with different hem lengths and styles, as they can significantly impact the overall look and feel of your outfits. By mastering this essential alteration, you'll be one step closer to achieving a wardrobe filled with garments that fit you perfectly and exude your personal style. |
||
 |
||
|
Ella's Alterations LLC 813-445-8894 https://ellasalterations.com |
||
Taking In or Letting Out Waistbands:The waistband of a skirt, dress, or pair of pants plays a crucial role in achieving a comfortable and flattering fit. Sometimes, you may find that a waistband is too tight, causing discomfort, or too loose, resulting in an unflattering fit. Learning how to take in or let out waistbands is an essential skill that every fashionista should possess. Before diving into this alteration, it's important to note that waistband adjustments can vary in complexity depending on the garment's construction and fabric. While simple alterations can be done at home, more complex modifications may require the expertise of a professional tailor. Here's a general guide on how to take in or let out a waistband: Determine the needed adjustment: Try on the garment and assess whether the waistband needs to be taken in or let out. Pinch the excess fabric or measure the gap to determine the necessary alteration. Locate the waistband seam: Look for the seam where the waistband is attached to the main body of the garment. This is typically located at the top of the garment, just below the waistline. Taking in the waistband: If the waistband needs to be taken in, you will need to remove some fabric from the waistband. Locate the seam allowance on the inside of the waistband and carefully remove the stitches using a seam ripper. Take note of how much fabric you need to remove and mark it with pins or fabric chalk. Sew the new waistband seam: Fold the waistband over to the desired size, aligning the pins or marked points. Secure the new seam with pins, ensuring that the fabric lays flat and evenly. Use a sewing machine or needle and thread to stitch along the new seam line, keeping the stitches neat and even. Letting out the waistband: If the waistband needs to be let out, you will need to add extra fabric to the waistband. In this case, you can either use matching fabric to extend the waistband or insert additional fabric panels. Seam allowance will depend on the width of the waistband and the desired adjustment. Blend the new fabric with the existing waistband: To ensure a seamless look, carefully blend the new fabric or fabric panel with the existing waistband fabric. This may involve tapering the added fabric to match the width of the original waistband or using fabric from inconspicuous areas of the garment. Sew the new fabric or panel in place: Secure the new fabric or panel in place using pins or basting stitches. Stitch along the edges to attach the new fabric to the existing waistband, making sure the stitches are hidden within the original seam line. Finishing touches: Trim any excess fabric and press the waistband to create a smooth and professional finish. Make sure to follow the fabric's care instructions to avoid damaging it with excessive heat. Taking in or letting out waistbands can greatly improve the fit and comfort of your garments. It allows you to customize the waistline to your body shape and ensures that your clothes sit perfectly on your hips or waist. This alteration is particularly useful for pants, skirts, and dresses with defined waistlines, such as high-waisted styles or those with waistbands that are separate from the rest of the garment. For more intricate waistband adjustments or if you're unsure about tackling this alteration on your own, it's best to consult a professional tailor. They have the expertise to work with different fabrics, navigate complex waistband constructions, and provide guidance on achieving the best fit for your specific garment. Taking in or letting out waistbands is a transformative clothing alteration that can breathe new life into ill-fitting garments. With this skill in your repertoire, you'll be able to confidently tailor your waistbands to achieve a flattering fit, enhance your comfort, and elevate your overall style. Remember, precision is key when working on waistbands, as any errors or unevenness can affect the overall appearance and comfort of the garment. Take your time, measure accurately, and be patient throughout the alteration process. With practice and attention to detail, you'll become adept at adjusting waistbands and enjoy the benefits of a wardrobe filled with perfectly fitting clothes that flatter your figure. |
||
 |
||
| Wedding Dresses, What To Expect and How To Alter | ||
|
Ella's Alterations LLC 813-445-8894 https://ellasalterations.com |
||
Reshaping or Taking In the Shoulders:The fit of the shoulders can significantly impact the overall appearance and comfort of a garment. Ill-fitting shoulder seams can make an outfit look sloppy or disproportionate, while perfectly tailored shoulders create a polished and flattering silhouette. Reshaping or taking in the shoulders is an essential clothing alteration that can transform the way a garment sits on your body. Before proceeding with this alteration, it's important to note that reshaping or taking in shoulders can be a more advanced alteration. Depending on the garment's construction and fabric, it may require intermediate sewing skills or the expertise of a professional tailor. Here's a general guide on how to reshape or take in the shoulders of a garment: Assess the fit: Put on the garment and assess the fit of the shoulders. Pay attention to the position of the shoulder seams and whether they align with your natural shoulder line. Pinch or mark areas that require adjustment. Determine the alteration method: Depending on the fit issues, you may need to reshape the shoulders or take them in. Reshaping the shoulders involves modifying the curve of the shoulder seams, while taking in the shoulders reduces their width. Reshaping the shoulders: If reshaping the shoulders is necessary, start by removing the shoulder pads if they are present. Carefully unpick the shoulder seams, starting from the sleeve end and working towards the neckline. Try on the garment and use pins or fabric chalk to mark the desired new shoulder shape. Pin the fabric along the new markings and stitch along the marked lines. Trim any excess fabric, press the seams, and reattach the shoulder pads if desired. Taking in the shoulders: To take in the shoulders, you'll need to remove excess fabric along the shoulder seams. Start by unpicking the shoulder seams as mentioned in the previous step. Try on the garment and determine how much fabric needs to be removed from each shoulder. Pin along the new shoulder seam line and stitch along the marked lines. Trim any excess fabric, press the seams, and reattach the shoulder pads if necessary. Finishing touches: Once the shoulder alteration is complete, try on the garment to ensure the new fit is comfortable and visually appealing. Make any necessary adjustments and press the seams to create a smooth finish. Reshaping or taking in the shoulders of a garment can improve the overall fit and structure, giving it a more tailored and flattering appearance. This alteration is particularly useful for jackets, blouses, dresses, and tops where the shoulder fit is crucial for the garment to hang properly on the body. It's worth noting that altering shoulder seams can affect other parts of the garment, such as the armhole shape or sleeve length. Therefore, it's essential to consider the garment as a whole and make corresponding adjustments if necessary. If you're uncertain about reshaping or taking in the shoulders on your own, it's advisable to consult a professional tailor. They have the expertise to assess the garment's construction and fabric, and provide guidance on achieving the best fit while maintaining the overall integrity of the design. Reshaping or taking in the shoulders is a transformative alteration that can elevate the look and fit of your garments. By achieving the perfect shoulder fit, you'll enhance your overall style, create a streamlined silhouette, and exude confidence in your outfits. With practice and attention to detail, you'll become skilled at this essential clothing alteration, allowing you to tailor your garments to perfection. |
||
 |
||
Shortening or Lengthening Sleeves:The length of the sleeves can significantly affect the overall balance and style of a garment. Whether it's a shirt, blouse, dress, or jacket, sleeves that are too long or too short can be both uncomfortable and visually unappealing. Learning how to shorten or lengthen sleeves is an essential clothing alteration that allows you to achieve the perfect fit and enhance the overall look of your garments. Before you begin altering the sleeves, gather the necessary tools: a sewing machine or needle and thread, pins, fabric scissors, a measuring tape, and an iron. Follow these steps to shorten or lengthen sleeves: Shortening Sleeves:Try on the garment and determine how much you want to shorten the sleeves. Pin or mark the desired length. Take off the garment and turn it inside out. If there is an existing cuff or hem on the sleeve, carefully remove it using a seam ripper. Fold the sleeve fabric up to the desired length, following the marked line. Use pins to secure the fold in place, making sure it is even all the way around. Try on the garment again to double-check the sleeve length. Make any necessary adjustments before proceeding. Using a sewing machine or needle and thread, stitch along the folded edge, approximately 1/4 to 1/2 inch away from the edge. Use a straight stitch or a blind hem stitch for a clean finish. Once the sleeves are stitched at the new length, try on the garment again to ensure the sleeves fall at the desired position. Trim any excess fabric, leaving a small seam allowance. This step is optional but can help reduce bulk in the sleeve hem. Press the sleeve hem with an iron to give it a crisp finish. Follow the fabric's care instructions to avoid damaging it with excessive heat. Lengthening Sleeves:Assess the garment and determine the required lengthening amount for the sleeves. This may involve adding fabric or extending the existing fabric. Find matching fabric that matches the color, texture, and weight of the existing sleeves. If necessary, wash and press the fabric before cutting. Measure and mark the desired length on the sleeve. If extending the existing fabric, measure and mark where the extension will be added. Cut a piece of fabric to the desired length and width, allowing for seam allowances. Attach the additional fabric to the sleeve by aligning the edges and pinning them together. Use a sewing machine or needle and thread to stitch along the pinned edges, creating a secure seam. Once the fabric is attached, try on the garment to ensure the lengthening is visually pleasing and comfortable. Trim any excess fabric, leaving a small seam allowance. Press the seam to create a smooth finish. By mastering the art of shortening or lengthening sleeves, you can achieve the ideal sleeve length for your body proportions and personal style. This alteration technique allows you to rescue garments with sleeves that are too long or breathe new life into pieces with sleeves that are too short. It also gives you the flexibility to adapt your clothing to different seasons or trends, ensuring your sleeves always hit the perfect mark. If you are new to sewing or find the alteration process challenging, consider consulting a professional tailor. They have the expertise to handle different fabrics and sleeve styles, ensuring a seamless and professional alteration. Remember, the goal of shortening or lengthening sleeves is to create a harmonious balance and a visually pleasing look. Take your time, measure accurately, and pay attention to detail. With practice, you'll become more confident in altering sleeves, allowing you to achieve the perfect fit and style for your garments. |
||
 |
||
|
||
| Master the Art of Flower Girl Dress. | ||
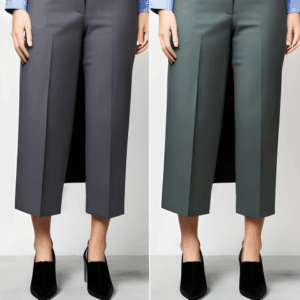
Tapering Pants and Skirts:The fit of pants and skirts can greatly impact your overall appearance and style. Ill-fitting bottoms that are too loose or overly baggy can detract from your outfit's sleekness and elegance. Tapering pants and skirts is an essential clothing alteration that can transform your garments into flattering and well-fitted pieces that accentuate your body shape. Before you begin tapering pants or skirts, gather the necessary tools: a sewing machine or needle and thread, pins, fabric scissors, a measuring tape, and an iron. Follow these steps to taper your bottoms: Try on the pants or skirt and assess the fit. Determine how much tapering is needed and which areas require adjustment. Pinch or mark the excess fabric to be taken in. Take off the garment and turn it inside out. If there are side seams, locate them and carefully remove the stitches using a seam ripper. If there are no side seams, you may need to open the inseam or outseam. Put the garment back on and adjust the pins or marks to achieve the desired taper. The tapering should start from the hip or thigh area and gradually narrow down towards the hem. Once you're satisfied with the new fit, use pins to secure the fabric along the tapered line. Make sure the fabric lays flat and even on both sides. Take off the garment and measure the pinned area to ensure symmetry and accuracy. Adjust the pins if necessary. Using a sewing machine or needle and thread, stitch along the pinned line, following the original seam allowance or slightly narrower. For a professional finish, use a straight stitch or a narrow zigzag stitch. Try on the garment again to ensure the taper is visually pleasing and comfortable. Make any necessary adjustments before proceeding. Trim any excess fabric, leaving a small seam allowance. This step is optional but can help reduce bulk in the seams. Press the new seam with an iron to give it a crisp finish. Follow the fabric's care instructions to avoid damaging it with excessive heat. Tapering pants and skirts can instantly elevate the style and fit of your bottoms, providing a sleek and tailored look. This alteration is particularly beneficial for wide-leg pants, flared skirts, and A-line skirts that require a more streamlined silhouette. If you're new to sewing or find the alteration process daunting, it's advisable to consult a professional tailor. They possess the expertise to work with different fabrics, navigate complex seam constructions, and ensure precise tapering that enhances the garment's overall design. Tapering pants and skirts not only improves the fit but also allows you to adapt your wardrobe to current trends and personal preferences. With this alteration skill, you can transform your bottoms into fashion-forward pieces that showcase your individual style. Remember, tapering requires attention to detail and precision. Take your time, measure accurately, and ensure the fabric lays flat and even before stitching. With practice, you'll become more proficient in tapering different types of pants and skirts, enabling you to create a well-tailored wardrobe that flatters your figure and showcases your unique fashion sense. |
||
 |
||
Adding Darts for a Fitted Look:Achieving a perfectly fitted garment is key to looking polished and put together. Sometimes, off-the-rack clothing may not conform perfectly to your body shape, resulting in a loose or boxy fit. Adding darts is a valuable clothing alteration technique that allows you to tailor your garments for a more flattering and contoured look. Whether it's a blouse, dress, or jacket, darts can create shape and enhance the overall fit of your clothing. Before you begin adding darts, gather the necessary tools: a sewing machine or needle and thread, pins, fabric scissors, a measuring tape, and an iron. Follow these steps to add darts to your garments: Try on the garment and identify the areas where additional shaping is needed. Common areas for adding darts include the bust, waist, and back. Mark the position of the darts using pins or fabric chalk. For bust darts, the markings should align with the fullest part of your bust. For waist darts, they should correspond to your natural waistline. Back darts are typically positioned parallel to the center back seam. Take off the garment and turn it inside out. Locate the markings from the previous step and draw the dart lines on the wrong side of the fabric using a ruler and fabric chalk. The lines should taper to a point at the apex of the dart. Pin along the dart lines, ensuring that the fabric lays flat and smooth. Start from the wide end of the dart and taper towards the point. Try on the garment again to verify the dart placement and fit. Make any necessary adjustments before proceeding. Using a sewing machine or needle and thread, stitch along the pinned lines, following the marked dart lines. Start from the wide end and gradually taper towards the point, backstitching at the beginning and end to secure the stitches. After stitching the darts, try on the garment to ensure the fit is flattering and comfortable. Make any necessary adjustments before proceeding. Trim any excess fabric, leaving a small seam allowance. This step is optional but can help reduce bulk in the dart area. Press the darts with an iron, pressing them towards the center of the garment. Follow the fabric's care instructions to avoid damaging it with excessive heat. Adding darts allows you to customize the fit of your garments, creating a more tailored and figure-enhancing look. Darts are particularly beneficial for creating shape in dresses, blouses, and jackets, as they contour the fabric to your body curves. If you're new to sewing or find the alteration process challenging, consider consulting a professional tailor. They possess the expertise to assess your body shape, determine the appropriate placement of darts, and execute them with precision. By adding darts, you can transform your garments from shapeless to chic, accentuating your curves and creating a polished appearance. This alteration technique allows you to customize your clothing to your unique body shape and style preferences, ensuring a flattering and personalized fit. Remember, accuracy is crucial when adding darts. Take your time, measure and mark carefully, and ensure the fabric lays flat and smooth before stitching. With practice, you'll become more confident in adding darts, allowing you to achieve a professional-looking fit that elevates your fashion game. |
||
 |
||
Resizing Tops and Dresses:Finding the perfect fit when it comes to tops and dresses can be a challenge. Off-the-rack garments may not always accommodate individual body proportions, leading to loose or tight fits in certain areas. Resizing tops and dresses through alterations is a valuable skill that allows you to tailor these garments to your specific measurements, ensuring a flattering and comfortable fit. Whether it's adjusting the bust, waist, or overall size, resizing can transform an ill-fitting piece into a wardrobe staple. Before you begin resizing tops and dresses, gather the necessary tools: a sewing machine or needle and thread, pins, fabric scissors, a measuring tape, and an iron. Follow these steps to resize your tops and dresses: Try on the garment and identify the areas that require resizing. Common areas include the bust, waist, hips, and overall length. Mark the areas to be adjusted using pins or fabric chalk. For the bust, waist, and hips, pin along the desired new seam lines to achieve the desired fit. For the length, mark the new hemline using pins or fabric chalk. Take off the garment and turn it inside out. If there are existing seams in the areas to be resized, carefully unpick them using a seam ripper. Using the marked lines as a guide, stitch along the new seam lines, following the pins or fabric chalk. Start by securing the stitch at the beginning and end with backstitching. For a professional finish, use a straight stitch or a zigzag stitch, depending on the fabric's stretch. Once the resizing stitches are complete, try on the garment to ensure the new fit is flattering and comfortable. Make any necessary adjustments before proceeding. Trim any excess fabric, leaving a small seam allowance. This step is optional but can help reduce bulk and make the alteration less noticeable. If the garment has a hem, adjust the length accordingly by folding and stitching the new hemline. Press the hem with an iron for a clean finish. Finally, press the altered seams and any other areas that were sewn to give the garment a polished look. Follow the fabric's care instructions to avoid damaging it with excessive heat. Resizing tops and dresses allows you to tailor your clothing to your unique body shape, ensuring a flattering and comfortable fit. This alteration technique is particularly beneficial for garments with non-stretch fabrics or structured designs. If you're new to sewing or find the alteration process challenging, consider consulting a professional tailor. They possess the expertise to assess your body shape, determine the appropriate adjustments, and execute them with precision. By resizing tops and dresses, you can transform your wardrobe into a collection of well-fitting garments that enhance your silhouette and boost your confidence. Whether it's a blouse, a dress, or a tunic, this alteration technique enables you to customize your clothing to suit your style and body proportions. Remember, accurate measurements and attention to detail are essential when resizing tops and dresses. Take your time, measure carefully, and ensure the fabric lays flat and smooth before stitching. With practice, you'll become more proficient in resizing garments, allowing you to achieve a personalized fit that flatters your figure and showcases your unique fashion sense. |
||
 |
||
Adding or Removing Buttons and Zippers:Buttons and zippers are essential components of many garments, providing functionality and adding decorative elements. However, there are instances where you may need to add or remove buttons and zippers to improve the fit, update the style, or replace damaged closures. Learning how to handle these alterations gives you the flexibility to customize your clothing and ensure that they meet your specific needs. Before you begin adding or removing buttons and zippers, gather the necessary tools: a sewing machine or needle and thread, buttons or zippers, pins, fabric scissors, a measuring tape, and an iron. Follow these steps to complete these alterations: Adding Buttons:Identify the ideal position for the button(s) based on the garment's design and your desired fit. Use pins or fabric chalk to mark the placement. Select the appropriate buttons that match the garment's style and fabric. Consider the size, color, and thickness of the buttons. Thread a needle and knot the end. Insert the needle through the wrong side of the fabric, coming up through the marked position. Thread the needle through the holes of the button, ensuring it is secure. Repeat this process several times to reinforce the attachment. Once the button is securely attached, knot the thread on the wrong side of the fabric. Trim any excess thread. Removing Buttons:Use a seam ripper or small scissors to carefully remove the stitches holding the button in place. Take caution not to damage the fabric. Gently pull out the threads and remove the button. Use a lint roller or tape to remove any loose threads or residue left behind. Adding Zippers:Determine the appropriate zipper length based on the garment's opening. If necessary, trim the zipper to the desired length, leaving a small allowance. Pin the zipper in place along the fabric edges, ensuring it aligns with the opening. Use fabric chalk to mark the top and bottom stops of the zipper. Attach a zipper foot to your sewing machine. With the right sides of the fabric facing down, position the zipper face-down on one side of the opening. Align the marked stops with the fabric edges. Stitch along the zipper tape, using a straight stitch or a zipper stitch. Start from the top stop and sew down to the bottom stop. Repeat this process on the other side of the opening. Once the zipper is attached, use a seam ripper or small scissors to carefully open the basting stitches holding the fabric edges together. Removing Zippers:Locate the stitches holding the zipper in place. Using a seam ripper, gently cut the threads to remove the stitching. Pull out the zipper carefully, taking care not to damage the fabric. Adding or removing buttons and zippers allows you to modify your garments to improve the fit, update the style, or replace damaged closures. These alterations can be applied to various types of clothing, including shirts, dresses, pants, and jackets. If you're new to sewing or find the alteration process challenging, consider consulting a professional tailor. They possess the expertise to assess the garment's design and fabric, recommend suitable closures, and execute the alterations seamlessly. By adding or removing buttons and zippers, you can personalize your clothing and ensure that they meet your functional and aesthetic preferences. These alterations provide you with the flexibility to adjust closures based on your body shape, fashion trends, or personal style. Remember, precision is vital when adding or removing buttons and zippers. Take your time, measure accurately, and secure the closures firmly. With practice, you'll become more proficient in these alterations, enabling you to transform and customize your garments with ease. |
||
 |
||
Adjusting Necklines:The neckline of a garment plays a significant role in its overall design and appearance. It frames the face and accentuates the upper body, making it an essential element to consider when it comes to achieving a flattering and stylish look. However, the neckline of a ready-to-wear garment may not always meet your preferences or flatter your body shape. Adjusting the neckline through alterations allows you to customize your garments and create a look that suits your personal style. Whether it's making a neckline smaller, deeper, or reshaping it, this alteration can transform the entire aesthetic of a garment. Before you begin adjusting necklines, gather the necessary tools: a sewing machine or needle and thread, pins, fabric scissors, a measuring tape, and an iron. Follow these steps to adjust necklines: Try on the garment and assess the neckline. Determine the desired changes, such as making it smaller, larger, deeper, or reshaping it. Mark the new neckline shape using pins or fabric chalk. Take into consideration the desired depth and width, ensuring it suits your body shape and style preferences. Carefully remove the existing stitches along the neckline using a seam ripper. Take care not to damage the fabric. Once the stitches are removed, try on the garment again to ensure the marked changes align with your desired fit and appearance. Make any necessary adjustments before proceeding. Using a sewing machine or needle and thread, stitch along the new neckline shape, following the marked lines. For a professional finish, use a straight stitch or a narrow zigzag stitch, depending on the fabric's stretch. Trim any excess fabric, leaving a small seam allowance. This step is optional but can help reduce bulk and make the alteration less noticeable. Press the new neckline with an iron, using steam if appropriate for the fabric. Follow the fabric's care instructions to avoid damaging it with excessive heat. Adjusting necklines allows you to tailor your garments to your specific preferences and body shape. This alteration technique is particularly useful for dresses, tops, blouses, and even jackets, as the neckline can greatly impact the overall look and style of these garments. If you're new to sewing or find the alteration process challenging, consider consulting a professional tailor. They possess the expertise to assess your body shape, recommend suitable neckline alterations, and execute them with precision. By adjusting necklines, you can create garments that flatter your neckline, highlight your facial features, and align with your personal style. This alteration technique allows you to transform your clothing into unique pieces that reflect your individuality. Remember, accuracy and careful planning are essential when adjusting necklines. Take your time, measure and mark accurately, and ensure the fabric lays flat and even before stitching. With practice, you'll become more confident in altering necklines, allowing you to create garments that showcase your style and enhance your overall appearance. |
||
 |
||
Repairing Rips and Tears:No matter how careful we are with our clothing, rips and tears can happen unexpectedly. Instead of discarding a beloved garment or resigning it to the back of your closet, repairing rips and tears through simple alterations can extend its lifespan and save you money. This skill is essential for any fashionista who wants to maintain a well-curated wardrobe. By mastering the art of repairing rips and tears, you can salvage damaged garments and keep them in pristine condition. Before you begin repairing rips and tears, gather the necessary tools: needle and thread (matching the garment's color), fabric patches, fabric glue, fabric scissors, pins, and an iron. Follow these steps to repair rips and tears: Assess the extent of the rip or tear. Determine whether it requires a simple stitch, patch, or both. If the fabric has a clean tear without frayed edges, you can mend it with a simple stitch. Thread a needle with matching thread and knot the end. Align the edges of the tear and pin them together to hold them in place. Begin stitching from the backside of the fabric, securing the thread with a small knot. Using a small, even running stitch, sew along the tear, following the original stitching lines if possible. Ensure your stitches are close together for a strong and seamless repair. Tie off the thread with a knot when you reach the end of the tear. For larger or frayed tears, consider using a fabric patch. Select a patch that matches the fabric's color and texture. Trim any loose or frayed threads around the tear, creating clean edges. Place the fabric patch on the inside of the garment, aligning it with the tear. Pin it in place to secure it temporarily. Thread a needle with matching thread and knot the end. Begin stitching along the edges of the patch, sewing it to the garment. Use a small whip stitch or a slip stitch to ensure a secure attachment. Tie off the thread with a knot when you reach the end. If the tear is in a visible area, use fabric glue to secure the edges before applying the patch. Follow the glue manufacturer's instructions for the best results. Once the repair is complete, press the garment with an iron to ensure a smooth finish. Use low heat settings appropriate for the fabric to avoid damaging it. Repairing rips and tears not only allows you to salvage your favorite garments but also promotes sustainability by reducing waste. This alteration technique can be applied to various types of clothing, including shirts, pants, skirts, and jackets. If you're unsure about your sewing skills or the fabric requires specialized techniques, consider seeking assistance from a professional tailor. They possess the expertise to assess the damage, recommend appropriate repair methods, and execute them flawlessly. By mastering the art of repairing rips and tears, you can prolong the life of your garments and maintain a high-quality wardrobe. Not only will you save money, but you'll also contribute to a more sustainable fashion industry. Remember, patience and attention to detail are crucial when repairing rips and tears. Take your time, align the edges accurately, and sew or patch carefully. With practice, you'll become more skilled at repairing damaged garments, ensuring they remain a part of your fashion repertoire for years to come. |
||
 |
||
| Ella’s Alterations LLC 813-445-8894 https://ellasalterations.com Call Now! 813-445-8894 |
||
Conclusion:As a fashionista, mastering essential clothing alterations is a valuable skill that empowers you to take control of your wardrobe. The ten alterations discussed in this blog—hemming pants and skirts, taking in or letting out waistbands, reshaping or taking in the shoulders, shortening or lengthening sleeves, tapering pants and skirts, adding darts for a fitted look, resizing tops and dresses, adding or removing buttons and zippers, adjusting necklines, and repairing rips and tears—provide a comprehensive toolkit for transforming garments to fit your unique style and body shape. By learning these alterations, you can revitalize your clothing collection, turning ill-fitting or damaged garments into fashion-forward and personalized pieces. Not only do these alterations enhance your appearance, but they also contribute to a more sustainable fashion industry by reducing waste and promoting garment longevity. While the art of altering clothing may seem daunting at first, practice and patience will lead to proficiency. Remember, accuracy and attention to detail are crucial throughout the alteration process. Whether you're a seasoned seamstress or a novice with a needle and thread, consulting a professional tailor can offer invaluable guidance and expertise. With each alteration, you have the opportunity to express your individuality and create a wardrobe that truly reflects your style. Embrace the creative possibilities that clothing alterations offer and experiment with different techniques to unlock your fashion potential. So, fashionistas, let your imagination run wild and embrace the power of clothing alterations. Transform your garments, tailor them to perfection, and unleash your unique sense of style. With these ten essential alterations in your repertoire, you'll confidently navigate the world of fashion, always looking and feeling your best. 10 Essential Clothing Alterations Every Fashionista Should Know! #ClothingAlterations #FashionistaTips #StyleCustomization #SewLikeAPro #WardrobeRevamp #FashionAlterations #TailoringTechniques #PersonalizedFashion #FashionEmpowerment #SustainableStyle #DIYAlterations #FashionCraftsmanship #GarmentRestoration #FashionUpgrade #AlterationInspiration #FashionConfidence #WardrobeMakeover #FashionTransformation #CreativeAlterations #CustomFit #EllasAlterationsLLC |
||
|
|
||
|
||
| Hemming Pants: Do It Yourself or Use a Tailor/Seamstress. | ||
|