
The Complete Guide to Hemming Curtains: Time and Cost…
The Complete Guide to Hemming Curtains: Time and Cost Breakdown. |
|||
|---|---|---|---|
|
|
|||
Introduction:The Complete Guide to Hemming Curtains: Time and Cost Breakdown. Curtains play a crucial role in enhancing the aesthetics of a room, offering privacy, and controlling light. However, it can be frustrating when you find the perfect curtains only to realize they're too long for your windows. That's where hemming comes in. Hemming curtains is a simple and cost-effective solution to achieve the perfect fit. In this comprehensive guide, we will take you through the step-by-step process of hemming curtains, along with a time and cost breakdown, allowing you to transform your curtains into a tailor-made masterpiece. Hemming curtains not only ensures that they fit your windows precisely but also adds a touch of professionalism and refinement to their appearance. Whether you're a seasoned seamstress or a complete novice, this guide will equip you with the knowledge and skills needed to successfully hem your curtains. Not only does hemming provide functional benefits by preventing your curtains from dragging on the floor or obstructing furniture, but it also allows you to personalize the length to suit your style and preferences. By following the techniques outlined in this guide, you'll be able to achieve a customized look that complements your interior decor. Additionally, hemming your curtains can be a rewarding and cost-effective alternative to purchasing new ones. Rather than going through the hassle of finding curtains with the exact measurements you need, hemming allows you to transform existing curtains into perfectly fitted window treatments. It's a sustainable and budget-friendly solution that puts you in control of the final outcome. Throughout this guide, we'll cover the essential steps involved in hemming curtains, from assessing the length and gathering the necessary tools to marking the hemline and selecting the appropriate sewing technique. We'll also provide a breakdown of the time and cost associated with hemming, giving you a clear understanding of the commitment involved. So, whether you're looking to hem a single curtain or several, join us as we delve into the art of hemming curtains and unlock the potential to transform your space with beautifully tailored window treatments. Let's get started!.
|
|||
|
|
|||
Step 1: Assessing the Curtains:Before you begin hemming, it's essential to assess your curtains to determine the desired length and ensure a proper fit for your windows. Here's how to effectively assess your curtains: Measure the Window: Consider the Style and Function: Account for Curtain Headers: Measure for the Hemline: Consider Floor Clearance: By carefully assessing your curtains and taking accurate measurements, you'll be able to determine the ideal length and ensure a precise fit for your windows. This assessment serves as the foundation for the subsequent steps of hemming, enabling you to achieve professional-looking results. |
|||
|
|
|||
| Ella's Alterations LLC 813-445-8894 https://ellasalterations.com | |||
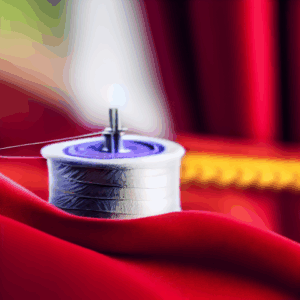
Step 2: Gather the Necessary Tools and Supplies:Before you start hemming your curtains, it's important to gather all the tools and supplies you'll need. Having everything prepared and within reach will streamline the hemming process and ensure smooth progress. Here are the essential tools and supplies you'll require: Measuring Tape: A flexible measuring tape is crucial for accurately measuring the curtain length, as well as determining the hemline and other dimensions. Fabric Marker or Tailor's Chalk: These tools are used to mark the hemline on the curtains. A fabric marker or tailor's chalk should be easily visible on your fabric and can be easily removed or washed out. Sharp Fabric Scissors: Invest in a pair of sharp fabric scissors that will cleanly cut through your curtain fabric. Dull scissors can lead to jagged edges or fraying. Pins: Sewing pins are essential for securing the fabric in place while you work on marking and sewing the hemline. Opt for sharp, fine pins that won't damage the fabric. Sewing Machine (or Needle and Thread): Depending on your preference and sewing skills, you'll need either a sewing machine or a needle and thread. A sewing machine allows for faster and more precise stitching, but hand sewing can be a suitable alternative if you don't have access to a machine or prefer a more hands-on approach. Iron: An iron is essential for pressing and setting the hemline after sewing. It helps create a crisp and professional finish. Ensure your iron is clean and in good working condition. Ironing Board or Pressing Surface: A stable ironing board or a pressing surface is necessary to support your curtains while pressing. Make sure it's clean and offers a flat surface for optimal results. Optional: Seam Ripper, Thread Snips, and Ruler: These tools come in handy if you make any mistakes or need to make adjustments along the way. A seam ripper helps remove unwanted stitches, thread snips keep your thread tidy, and a ruler assists in precise measurements and straight lines. By having these tools and supplies ready, you'll be fully equipped to begin the hemming process without any unnecessary interruptions. Ensure that your sewing machine, if used, is in good working condition, and your needles are suitable for the fabric type you're working with. |
|||
|
|
|||
| 10 Essential Clothing Alterations Every Fashionista Should Know! | |||
| Ella's Alterations LLC 813-445-8894 https://ellasalterations.com | |||
Step 3: Marking the Hemline:After assessing your curtains and gathering the necessary tools, it's time to mark the hemline. This step ensures that you achieve an even and consistent hem across the entire length of the curtains. Follow these steps to mark the hemline accurately: Prepare the Curtains: Lay your curtains on a flat and clean surface, such as a table or the floor. Smooth out any wrinkles or creases in the fabric, ensuring it lies flat and taut. Measure and Mark: Using your measuring tape, measure the distance from the bottom edge of the curtain to the desired hemline. Starting from one side of the curtain, make a small mark with a fabric marker or tailor's chalk at this measured distance. Repeat this process at multiple points along the hemline to ensure accuracy. Connect the Marks: Once you have marked the desired hemline at several points, use a straight edge, such as a ruler or a yardstick, to connect the marks. Draw a straight, horizontal line across the width of the curtain, ensuring it is parallel to the bottom edge. This line will serve as your guide for folding and sewing the hem. Double-Check the Hemline: Step back and visually inspect the marked hemline. Ensure that it is straight and consistent across the entire width of the curtain. Make any necessary adjustments to ensure an even hem. Additional Considerations: If your curtains have a pattern or a border, take extra care to align the pattern or border with the marked hemline. This ensures that the pattern remains uninterrupted and visually appealing even after hemming. By taking the time to accurately mark the hemline, you'll ensure that your curtains have a professional and polished finish. The marked line will guide your folding and sewing, resulting in an even hem that enhances the overall appearance of the curtains. |
|||
|
|
|||
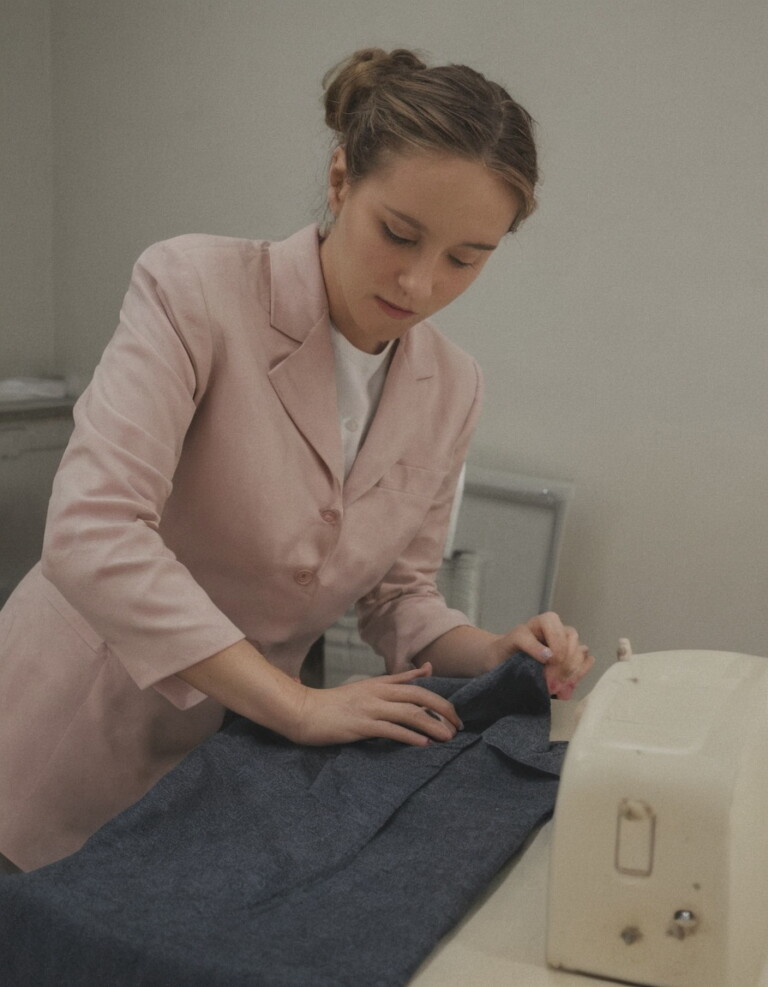
Step 4: Preparing for Hemming:Once you have marked the hemline on your curtains, it's time to prepare them for the hemming process. This step involves securing the fabric in place to prevent shifting during sewing. Follow these steps to properly prepare your curtains: Smooth Out the Fabric: Ensure that the fabric is smooth and free from wrinkles or folds. Smooth it out with your hands or use a gentle ironing technique on a low heat setting if necessary. Smooth fabric allows for more accurate folding and sewing. Fold the Fabric: Along the marked hemline, fold the bottom edge of the curtain up to meet the marked line. The folded fabric should align with the marked line, and the raw edge of the fabric should be hidden within the fold. The height of the fold depends on the desired length of the finished curtains. Secure with Pins: To keep the folded fabric in place, insert sewing pins vertically through both layers of the folded fabric. Start by pinning at one end of the curtain and continue to pin along the hemline at regular intervals, around every 4 to 6 inches. Make sure the pins go through both layers of the fabric securely. Check for Evenness: As you pin the fabric, periodically step back and inspect the curtains to ensure the folded hemline is even and consistent. Adjust the fabric as needed to maintain an even fold. Test the Length: Hang the curtain on a rod or hold it up to the window to verify that the length is as desired. Make any adjustments if you prefer a slightly longer or shorter hemline. By preparing your curtains in this way, you ensure that the fabric remains in place during the sewing process, reducing the chances of uneven or crooked hems. Securing the fabric with pins allows you to focus on the sewing without worrying about the fabric shifting.
|
|||
|
|
|||
|
|||
| Hemming Pants: Do It Yourself or Use a Tailor/Seamstress. | |||
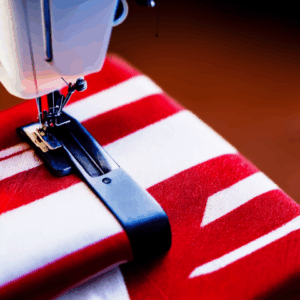
Step 5: Hemming Techniques:When it comes to hemming curtains, there are two primary techniques you can choose from: hand sewing and machine sewing. Both methods have their advantages, and the choice ultimately depends on your sewing skills, available resources, and personal preference. Let's explore both techniques: Hand Sewing: a. Thread your Needle: Choose a thread color that matches your curtain fabric. Thread a hand sewing needle with a strand of thread, and tie a knot at the end. b. Begin Stitching: Starting at one end of the folded hemline, insert the needle from the inside of the folded fabric, hiding the knot. Take a small stitch along the folded edge, about 1/4 inch or less, and pull the thread through. c. Continue Stitching: Move along the hemline, taking small, even stitches that secure the folded fabric. Space the stitches evenly, around 1/4 inch apart. Keep the stitches hidden within the fold, ensuring they are not visible from the front of the curtain. d. Knot the Thread: When you reach the end of the hemline, secure the thread with a knot on the inside of the fabric. Trim any excess thread. Machine Sewing: a. Set Up Your Machine: Select a thread color that matches your curtain fabric, and wind the bobbin with the thread. Thread the sewing machine needle and ensure your machine is set to a straight stitch. b. Align the Fabric: Position the folded hemline under the presser foot, aligning the edge of the fabric with the edge of the presser foot. Lower the presser foot to hold the fabric in place. c. Begin Sewing: Start sewing from one end of the hemline, gently guiding the fabric as you stitch. Sew a straight line along the folded edge, keeping the stitches close to the folded edge. Maintain a consistent speed to ensure even stitches. d. Secure the Stitching: Once you reach the end of the hemline, sew a few backstitches to secure the thread. Trim any excess thread. Whether you choose to hand sew or machine sew your curtains, remember to maintain even stitches and a straight line along the hemline. Take your time and sew at a pace that feels comfortable and controlled. |
|||
| Ella's Alterations LLC 813-445-8894 https://ellasalterations.com | |||
|
|
|||
Step 6: Pressing and Finishing Touches:After you've completed the hemming stitches, the final step to achieve a polished look is to press the curtains. Pressing helps set the stitches, smooth out any wrinkles, and gives your curtains a professional finish. Follow these steps to properly press your curtains: Set up your Ironing Station: Prepare your ironing board or pressing surface and plug in your iron. Adjust the iron to the appropriate heat setting based on the fabric type of your curtains. Refer to the fabric care instructions to avoid damaging the fabric. Precautions: If your curtains are made of delicate or synthetic fabrics, place a thin pressing cloth or a clean cotton cloth over the hemline before ironing. This will protect the fabric from direct heat and prevent any shine or damage. Press the Hemline: Lay the curtains flat on the ironing board, ensuring that the hemline is straight and visible. Gently press the iron along the folded hemline, moving from one end to the other. Apply even pressure and use a back-and-forth motion to press the fabric. Focus on Detailing: Pay extra attention to corners and edges to ensure they are crisp and well-defined. Use the tip of the iron to press these areas carefully. If necessary, fold the corners neatly to create a clean finish. Allow Cooling Time: After pressing, allow the curtains to cool and set the pressed folds. This will help the fabric retain its shape and the hemline to stay in place. Hang and Inspect: Hang your curtains on the rod or hold them up to the window to check the final length and appearance. Adjust the folds and make any necessary corrections if the hemline appears uneven. Finishing Touches: Trim any loose threads or excess fabric that may be visible along the hemline. Use thread snips or sharp fabric scissors for precise trimming. By pressing your curtains, you give them a polished and refined look. Pressing not only enhances the appearance but also ensures that the hemline stays in place, creating a neat and tailored finish. |
|||
|
|
|||
Conclusion:Hemming curtains is a valuable skill that allows you to customize your window treatments to fit your style and space perfectly. By following the steps outlined in this guide, you can achieve professional-looking results while saving both time and money. As you can see, Hemming curtains is not a small task and can be time consuming. Consider using Ella's Alterations LLC to hem your curtains. Let's recap the key points discussed: Assess your curtains by measuring the window, considering the style and function, and accounting for curtain headers and floor clearance.Gather the necessary tools and supplies, including a measuring tape, fabric marker or tailor's chalk, sharp fabric scissors, pins, sewing machine or needle and thread, iron, and ironing board or pressing surface. Mark the hemline accurately by measuring and marking the desired length, connecting the marks with a straight line, and considering the pattern or border alignment. Prepare the curtains for hemming by smoothing out the fabric, folding it along the marked hemline, and securing it with pins. Choose between hand sewing and machine sewing techniques based on your skills and resources, following the respective steps provided. Press the curtains to set the stitches, remove wrinkles, and create a professional finish. Pay attention to detail and allow the fabric to cool before inspecting the final length. Trim any loose threads or excess fabric for a clean and polished look. By mastering the art of hemming curtains, you have the freedom to tailor your window treatments to suit your unique style and preferences. Not only does hemming curtains provide a satisfying creative outlet, but it also allows you to achieve a cohesive and harmonious aesthetic in your living space. Remember, practice makes perfect. As you gain more experience with hemming, you'll become more confident and efficient in the process. Don't be afraid to experiment with different fabrics, patterns, and hem lengths to create curtains that truly enhance the ambiance of your home. So, grab your measuring tape, thread your needle or set up your sewing machine, and embark on the journey of hemming curtains. With the guidance provided in this complete guide, you're well on your way to transforming your plain curtains into customized window masterpieces. Happy hemming! The Complete Guide to Hemming Curtains: Time and Cost Breakdown. #HemmingCurtains #DIYHomeDecor #CustomWindowTreatments #SewingProject #HomeImprovement #CurtainHemming #Tailoring #HandSewing #MachineSewing #HomeDesign #InteriorDecor #CurtainStyle #WindowFashion #CreativeProjects #CustomizeYourSpace #PersonalizedCurtains #HemmingTips #SewingSkills #HomeMakeover #DoItYourself #EllasAlterationsLLC |
|||
|
|
|||
|
|||
| Ella's Alterations LLC 813-445-8894 https://ellasalterations.com | |||
| High-Low Hemlines: A Fun Twist on Traditional Wedding Dresses. | |||
|